Sunday, 19 October 2014

Bonkers for Conkers!

I absolutely love this time of year! The colours, the crisp, clear skies, the crunch of the leaves underfoot... oh and the conkers!!


Image from morguefile.com


I have so many happy memories of going out, collecting conkers with my parents...but what do you do with them once they're collected?

Here are just a few ideas for you to try (besides the traditional game of 'conkers'!):

First things first


  • Get your coats on and go out for a lovely Autumn walk. Notice the changes that are happening all around and, of course, collect lots of conkers. Remember to pick up some that are still inside their spiky shells!


Investigating


  • Why not set up an investigation table where the children can explore their conkers? Add a light box, some magnifying glasses, pictures and simple information books. 


  • Remember to ask some prompting questions to get the children thinking; for example "Do all of our conkers looks the same?"


  • You could also create some beautiful discovery bottles by adding the conkers (plus any other Autumn nature that you like) into a bottle either with or without water. These discovery bottles make a wonderful addition to your light table.


I love these seasonal discovery bottles from Sun Hats & Wellie Boots :


Maths


  • After collecting them, encourage your children to count how many conkers that they have in their bags, and develop their numeracy skills further by making comparisons i.e. Does George have more or less conkers in his bag than Belle?


  • Children can weigh and compare conkers using simple balance scales (if you don't have any scales, make your own using a clothes hanger and 2 pots!)


  • A simple muffin tin, or assortment of containers can allow children to sort and organise the conkers. This can be adult led and guided; for example "can you put 3 conkers into each pot?" or you can allow children to sort for their own criteria.


  • Create interesting designs and patterns with your conkers! Cover a large table with paper and draw some grids, circles or other outlines which the children can then use to create their own patterns.


Creative and Art


  • Painting a conker is a skill in itself! The children develop their problem solving skills as they work out how to prevent the conker from rolling away. Remember to add a blob of PVA glue into your paint so that it sticks to the shiny surface of your conkers.


  • Conker rolling: Using a deep tray or last years 'Quality Street' tin, line the bottom with paper, add some dollops of poster paint, add conkers and ROLL! Encourage the children to work out how to make the conkers roll across all of the paper by tipping and turning the tin in different ways.


  • Drawing pictures of the conkers is a lovely calm activity and encourages children to observe and notice details.


  • Transient Art is a type of art which is of the moment and not permanent. Provide some large sheets of paper (I find that black creates a nice contrast) and lots of loose autumn materials (leaves, conkers, twigs etc) and get creating!

Here is a lovely example of Autumn transient art from: NatureNurture :


  • Looking for a larger project? Try and create some large papier mache conkers. All you need is an inflated balloon, some ripped up newspaper (the children will enjoy helping with this!) and a thin mixture of PVA and water. Lots of messy, sensory fun to be had here!


Language and Literacy


  • Work with the children to create an Autumn word wall. Some 'conker' themed words include:


           Spiky
           Smooth
           Green
           Brown
           Round

Music


  • Encourage the children to explore their musical instruments to see if they can create spiky sounds (like the outer shell of the conker) or smooth sounds (like the conker itself).


  • Enjoy a music and movement session using some calming music (lots to be found on YouTube) and guide the children and they act out the growing tree, the changing seasons, and the falling of the leaves and conkers to the ground.


ICT


  • Use your computers/ tablets to access the Internet and find out more information about conkers. What are conkers? Do they have another name? Are there different types?


Construction


  • Another chance to roll those conkers! Build ramps using wooden blocks, large pieces of cardboard or long tubes and have a race! You can extend the learning by prompting the children to make predictions, for example: will the big conker or the small conker win the race?


Science


  • Include conkers as well as other Autumn objects in your water tray area and learn about floating and sinking.


Fine Motor Skills


  • Drill a small hole through each of your conkers and allow the children to practise threading them to create a necklace or maybe even a conker caterpillar!


  • Provide a variety of spoons, ladles etc as well as a few different containers and allow the children to practise scooping and moving the conkers from one place to another. (This takes patience, control and good hand-eye coordination!)


There are oh so many more activities for you to try using conkers. 
If you're wanting more, I'd recommend visiting www.pinterest.com (a fantastic resource for all EYPs!) if you are not already familiar with it.

Have fun!!

Sunday, 21 September 2014

Nature Journals

There are so many different ways to include mark making and writing in the outdoors, but one activity that the children in my nursery particularly enjoyed was to create and continually add to their very own nature journals.


These journals can be as simple or complicated as you want them to be, we used large 'nature coloured' sugar paper and bound it with a long stick at the spine, we then decorated our journals by painting using sticks, leaves, flowers etc.
Don't forget to encourage the children to write their names on their journal! They should be able to take ownership of their own special book and feel proud and excited by it.
If you wanted to be extra creative, you could make your own recycled paper (maybe including some pressed flowers) and use it to create beautiful book covers.
Be sure to add plenty of pages inside and if possible, use thick, sturdy paper that will not rip if it gets a little damp or beaten while the children are out and about.

Another nice touch that you could include into your nature journals is to add small plastic pouches or pockets so that the children can store and keep small pebbles, shells and other exciting materials. They can then bring them back to nursery and continue to explore their discoveries in other areas.

Once your nature journals are ready, collect some pencils, glue, sticky tape and scissors and take the children outdoors! It really doesn't matter where you go, the woods, the beach, the garden or a walk around the block, but as you're playing and exploring, encourage the children to collect small natural items that they find interesting, or draw a picture of them, or write the words!

When mark making outdoors, ensure to provide your children with a range of materials such as chunky pencils, felt pens, chalk, crayons or paints. If you provide a variety of resources, you are likely to find a method that appeals to most children, rather than putting anyone off (for example, one of my children would never choose to write or mark make unless felt pens were on offer – then there was no stopping them!)

My children were fascinated by all of the different types of leaves that they came across while exploring the outdoors. They glued them into their nature journals, drew around them, took rubbings of them and matched and sorted them into groups of colour. This was fantastic for early maths skills as well as science, expressive arts and of course, language and literacy as they learned new vocabulary and attempted to write them.

The more that you take your nature journals out with you, the more confident the children will become in adding into them. A nice way to promote this learning is for the adults/ teachers to have their own nature journals as well. Remember, if you are excited and engaged in an activity, the children will follow your lead!


Later, the children's journals can be used as an aid for reflecting on their learning. They be able to look back through their book and speak about previous trips and findings, encouraging their language skills further.


Don't forget to allow your children to show off their work to their parents, or maybe even take them home for the weekend and add some treasures from their own back garden – this learning certainly does not stay within the nursery!

Sunday, 14 September 2014

Lovely Lightboxes

Good evening everyone! I thought that today I would devote a post to a fantastic, sometimes a little under-appreciated resource - the Lightbox!


If you don't already have a lightbox (sometimes known as a light table) - don't panic! You can make your own quite easily by putting a lamp or some fairy lights into a large plastic container.
A nice simple tutorial can be found here.

Ok, first things first; in order to use your lightbox effectively you must put some thought into where  you'll put it and how you'll present it - hopefully making it into an exciting invitation to play!
My favourite way to set it out is to have the lightbox on a low table, or even set on the floor, so that it is easily accessible and at child height, and place it against a mirror, or better yet - surround it with a 3 sided mirror! 
There are some lovely examples of how to set out your light boxes on pinterest.

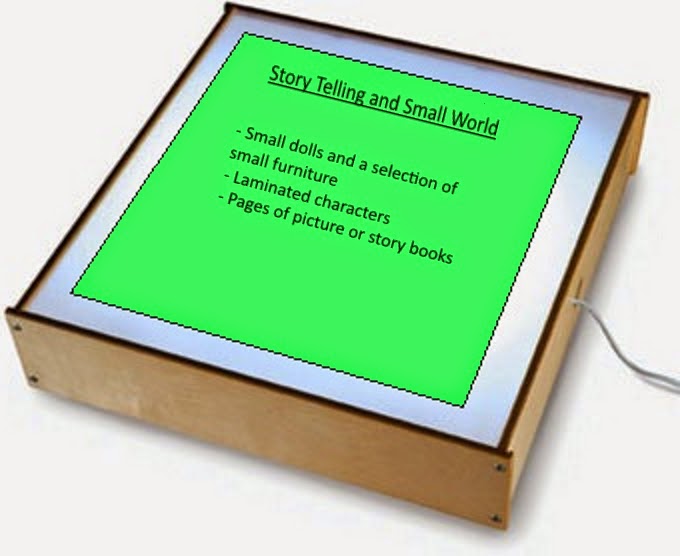
Now that your lightbox area is set up, you can start thinking about the skills that you want the children to be developing, and the resources that you can add to promote these skills!

Here are just a few ideas:


As well as these general ideas, there are many other ways to involve your lightbox in your learning, for example: if you are learning about the body and people who help us - you could add X-rays. If you are learning about Autumn, you could add discovery bottles with pine cones, conkers, leaves! You see? The possibilities are endless!

I find that the lightbox is a great way to encourage children to look at items in detail. It can also help children to concentrate and focus. I hope I have inspired you to have another look at your lightbox!

Here are some more fantastic lightbox ideas to inspire tou from blogs around the web:

Ice on the lightbox by Garden Gate Child Development Centre

A beautiful glittery light table by Fairy Dust Teaching

A huge selection of 'everyday' ways to use your lightbox from Teach Preschool


Saturday, 30 August 2014

86 ideas for fabulous outdoor fun (Part 4)

Well, it certainly has been a while since my last post! Apologies for this but I have been a very busy cookie - I have left my position at the nursery to return into the world of education. I have finally decided to take that big step and train to become a Primary Teacher! Wish me luck!

The other, very exciting, thing that has taken up an awful lot of my time is... I got married! On the 9th of August I was lucky enough to become the wife of the most fantastic man, and enjoy the best day of my life surrounded by family and friends.

Anyway! Enough about me - let's get back to thinking about the children and the many, many, many, MANY fantastic outdoor learning experiences


Caring for our environment


It's so important to teach children about the wonder of our environment and our impact on it. Here are a few ideas to get children thinking and caring...

Creating habitats


Attract creatures to your garden by building some simple habitats:


  • Minibeast home - You can use some natural resources to build homes for creepy crawlies. Use sticks and logs of all different shapes and sizes to create lots of nooks and crannies. Alternatively a cardboard box or an old pop bottle could be used. You can also use leaves or soil/ compost to create damp areas as well as dry. The best minibeast homes blend in with their natural surroundings.
  • Hedgehog home - Turn over a crate and cover it with soil and other natural resources to make it blend in with the surroundings. (Oh and make sure that there is a way for the hedgehogs to get in!)
  • Bird home - You know what a bird house looks like! But why not try your woodwork skills and build a 3 sided house that you can attach to a window. Add an entrance and some dried grass/ leaves/ something to make it into a cosy home. This way the children can see right inside as the birds use the home.

What are the children learning? 
They're learning about the different types of life in the world around us. They're learning about our impact on this life and how we can help or hinder it. They're learning about designing and creating, as well as choosing appropriate materials and they're learning about following instructions and working together. Oh, and of course the skill of observing the wildlife as well!

Planting and growing

I don't think I need to go into too much detail here - whether you have a plot of land, a corner of the garden or just a window box - children are fascinated by the process of planting and growing!

Some extension activities:
- Plant a range of seeds and have a 'race' to see which ones grow the fastest
- Try and guess the plant by looking at it's seed 
- Place one pot in a dark place and one in a light place and observe the differences as they grow (or don't grow as the case may be!) 
- Keep a 'Growing Diary' with pictures, words or even photographs. This is a great way to allow the children to use all of the new words and vocab that you'll have been teaching them throughout this activity.
- Measuring the plant's growth using a range of equipment such as rulers or tape measures.
- Picking and using and fruit/ veg that you have grown and using it in your food technology!

What are the children learning?

They are learning the science of the process of growing. They are learning about the variety and diversity of plants and growth around us. They are learning maths and through measuring growth and language and literacy through recording their observations.

Bird Feeders


Here are 2 simple ways that you can make your own bird feeders:


  • Use a large pine cone, smother it in butter or lard (messy and fun!) and then roll in bird seed. Attach string and viola!
  • Take some stale bread. Use a biscuit or playdough cutter to cut it into an attractive shape. Then use a sticky substance like honey and cover the bread before sprinkling with bird seed.
Make sure to hang them somewhere which is close enough that the children can observe through a window, but not too close that the birds are too afraid to use it!

What are the children learning?
So many things!:
You could add some books/ bird spotting sheets around the window area and allow the children to recognise and appreciate their local wildlife. They are learning about their impact on the creatures around them. They are learning to be quiet and patient while observing. Add some paper and pencils and encourage them to draw any birds that they see - bringing art and creative skills into the activity.

Litter picking

It's a bit sad, but I always really enjoy this activity!

Image from amazon.co.uk
Make sure to have a chat with the children before you head out about safety - make a mind map or 'risk assessment' including the essentials - namely - we do not touch the litter! And when we return to nursery - we wash our hands!

When I lead this activity, I read the children a story called 'Dinosaurs and all that rubbish' (Michael Foreman) which is a fantastic conversation starter. I then kitted the children out with rubber gloves and litter pickers, along with a few plastic bags.
(Now, we only had a few litter pickers, so I was able to include the all important skill of turn taking throughout this activity!)
When you get outside, it wont take long (sadly) to find some litter. Watch the children's co-ordination and motor skills develop along with their problem solving as they work out how to use the litter pickers to move the litter into the plastic bag. This could also be a great opportunity for teamwork if you have some children holding bags while others use the pickers.
As this activity continues, you can talk to the children about which objects are/ are not litter. How can you tell? Do you think this object should be here? What could happen if we leave our litter on the ground? What should we do with it? ... You get the idea :)

What are the children learning?
They are learning to be responsible citizens, to care for their environment and appreciate the world around them. They are also developing their thinking and speaking skills as well as physical capabilities.

Composting

This is a lovely side activity to link in with your gardening activities.
Here is a link to the BBC site with a step by step guide to get you started!


What are the children learning?
That garden and food waste can be re-used to create something valuable! They are also learning to be patient (composting does not happen over night) as well as all of the skills they they are gaining from their planting a growing activities.


You might also like:


Part 1: Let's get physical 


Part 2: No resources? No problem!


Part 3: Out in all weathers